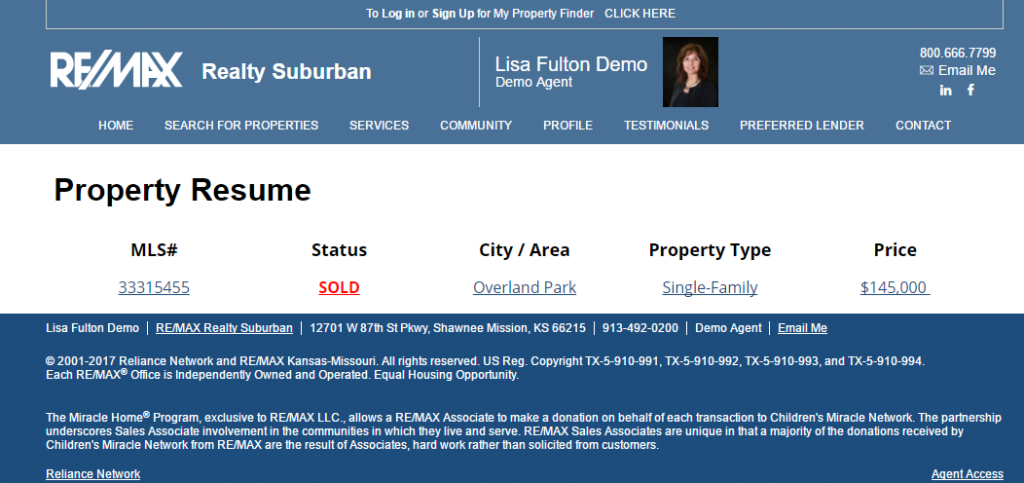
One of the greatest marketing tools at an agent's disposal is the ability to display listings that they have already sold. This shows your Buyers that you can help them find their perfect dream home. It can also show your Sellers that you have the skills necessary to sell their house for the best price.
Currently, once a listing has gone off the market in the MLS, the listing is removed from your engageRE account as well. Because Sold listings are such an important aspect of real estate marketing, engageRE has included a tool that will allow agents to manually create a Sold listing.
Create a Manual Listing
- After logging into your engageRE account, navigate to the LISTINGS > MANAGE tab in the top navigation.
- Click on the CREATE MANUAL LISTING button on the page.
- Check the box next to I accept the terms & conditions for Manual Listing Entry and enter the necessary information about the listing.
- Select "Manual-Override Listing" for Listing Type. NOTE: If you are in Mid States/Dixie and choose COR regions, you can choose the SOLD listing type.
- If the MLS number you entered is not available, you can create an MLS number of your own using a format that will keep you away from real MLS numbers, like this: 9991001, then 9991002 and so on. NOTE: Entering alphabetic characters or special characters in your MLS numbers is not allowed, so starting the manual number with 999 instead will prevent a numbering conflict with other listing numbers in the MLS.
- The longest expiration date available at this time is 180 days. Go ahead and select that option at this point. NOTE: If you are in Mid States/Dixie and choose COR regions, you can choose the the No Expiration option.
- Select the correct MLS, Property Type, and County for your listing.
- Click on Continue when finished.
- Enter the desired information on the Manual Listing Entry Form, choosing the ADD MANUAL LISTING button at the bottom when complete.
Update Manual Listing
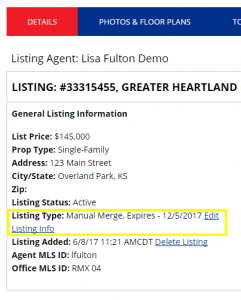
- Once the manual listing has been created, you will be taken to the DETAILS tab. NOTE: If you are in Mid States/Dixie and choose COR regions, you can skip to Step 2. Click on the Edit Listing Info link.
- Change the Expiration Date to "No Expiration Date."
- Also, change the Listing Type to "Sold Listing." Otherwise, this listing will show up in regular IDX listing searches.
- Scroll down to the bottom and select the SAVE MANUAL LISTING button.
- You can then click on the PHOTOS & FLOOR PLANS tab to add the Main Photo and Additional Photos, floor plans, virtual tours, etc.

Add A Property Resume Page To Your Website
- After you have added all of your Sold listings, you will need to create a page on your website to have these listings displayed. NOTE: If you are a WordPress or Premier subscriber, please contact us for this step.
- Navigate to the SITE BUILDER > CONTENT > PAGES tab in the top navigation bar.
- Click on Add Link under the header you wish to add the Sold listings display page.
- Under the Nav Title enter the name you would like to appear for the link on your website. An example title would be “Property Resume.”
- Select the Sort Value.
- Under URL, keep http:// and enter: "/index.asp?p=propertyresume"
- For Opens In select the “Same Window” option.
- Click SUBMIT and the listings should now appear on your website.


